Set up objects
Last updated: May 27, 2026
Create new objects, prepare and upload source files, and select classification methods
Create a new object
- From the folder-level under the General tab, select New object
and select one of the options in the dropdown menu, for example Object or Urban Mining Screener. Note: If this button is not visible, a folder of the right type must first be created. The default settings for Region, Municipality, Area, Company, and Subsidiary Folder Types prohibit adding buildings directly within them. Review and edit your Folder types and folder structure if necessary.
- A Pop up window will open. Please fill in the as * mandatory marked fields, for example the ‘Usage’ and ‘Gross Floor Area (GFA)’.
Either go on to fill in all information at once or any time after creating a new object, click on Editto adjust for example the Address, Building Phase or Delivery Date on the main tab. - On the extra tabs in the toolbar, you can insert other useful information about Labels, Energy, Building images and Lifespan.

- Click Save.
Prepare source files
To generate a Material Passport, a source file must first be uploaded into Madaster. The completeness and accuracy of a Material Passport is determined by the availability and quality of information within a source file. Madaster uses BIM/IFC models or a Madaster Excel template. The elements in these two types of source files should, as far as possible, include: geometric properties, a material description, and a classification coding.
- Determine the desired Performance Insights for your portfolio. In general, Madaster provides the following high-level insights:
- Mass – of materials/products stored in the object(s).
- Circularity – the degree of secondary materials used during construction, their utility, and their potential for reuse/recycling at end of use.
- Detachability – the degree to which products can be disassembled without damage.
- Environmental – impact during various stages the object’s lifecycle.
- Financial (residual) value – the future monetary value of materials at their end of life, accounting for the cost of disassembly, transportation, and processing for resale.
- Determine the type of source file(s) that will be prepared:
- For new construction and renovation objects, more and more information is recorded in BIM models. This form of recording offers the most advantages regarding the successful and accurate preparation of a Material Passport in the Madaster Platform. The Madaster Platform primarily uses IFC files (IFC4 or IFC2x3) of the objects to provide insight into the quantities of materials used.
- For existing objects, drawings and specifications are typically available. These can be translated (by building industry professionals when necessary) into BIM models or, alternatively, processed in the Madaster Excel template to prepare a Material Passport in the Madaster Platform. Please note, when Excel is used as a source file, a 3D representation of the object cannot be generated on the Madaster platform.
- Prepare the source file(s):
- Prepare a BIM IFC Source File
- Or, prepare an Excel Source File
Upload Source Files into Madaster
- From the object-level General or Dossier tab, select Upload.
- Select File Type and click Select file(s).
- Select Classification method or select Upload Preset (if available).
- Select Languages for enrichment.
- Select database(s) from the Available verified databases or other Available databases to mark them as the Selected sources for enrichment. Click Save.
Note: The order of the selected datasources is also the priority used in the matching process.
Note: Multiple source files can be uploaded in Madaster per object. For example, architectural, installations/HVAC, construction, and interior models.
Managing uploaded source files in Madaster
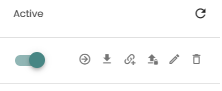
- From the object-level Dossier tab, switch the radio button to make sure that the uploaded source file is Active.
- When a source file is outdated, a newer source file can be uploaded without losing the linked elements. From the Dossier tab, click the icon
on the right side of the Active radio button.
Manage your objects
There are many built-in functionalities to create presets for upload, organize and split your objects, archive or transfer them and explore different design alternatives. Click here to read more of how to keep your objects organized.